 Dan Granback of Energy Inspectors conducts the blower door test Dan Granback of Energy Inspectors conducts the blower door test We set out on this energy-efficient remodel to prove that it didn’t have to cause a giant sucking sound in your wallet. To do it right, though, all energy-efficient remodels should conduct a blower door test of air-tightness, we’ve decided, after discovering its diagnostic power this week. This was a literal giant sucking sound in our house as we neared completion. The blower door test pulls air through the house with all windows and doors closed to measure how much air flows through a specific size opening. If the house has many holes in the envelope, the air flow will be high, indicating that heating and cooling load will be higher. If the house is sealed up tightly, the air flow will be low, which is the goal of an energy efficient remodel. Once the house has been designed to be a certain size and orientation to the sun, and the insulation and windows and doors have been set, and the appliances and mechanical systems have been chosen, the biggest remaining variable in performance is the construction of the building envelope. Done well, the builder seals up the envelope as he goes. Done without enough care, the building allows outside air in and the heater and air conditioner have to compensate. So it came time for the Net Zero Nest to get its report card in March when the full envelope was complete, including drywall, windows, flooring, stucco, roofing, electrical outlets, plumbing fixtures, and tile. It’s like brewing beer – you clean your equipment, choose your ingredients, boil them up, ferment, bottle, and wait a month to see how you did. In homebuilding, you frame the house, install windows and doors, seal holes with foam, drywall, caulk, and all the other steps with no feedback on how you’ve done until the blower door test. We set up the blower door at 50 mpa pressure and measured the air flow through the opening in cubic feet per minute (CFM). It was 1,670 cfm, about double our target. The target comes from taking the cubic feet of space in the house, which in our case is about 18,000, and calculating the airflow that would move 3 times the house volume through the house each hour, or 3 air changes per hour (ACH). The air flow in cfm gets multiplied by 60 to cubic feet per hour, in this case 100,000 cfh and is divided by the volume to give ACH. We started the test at 5.6 ACH, a far cry from our target of 3 !!! Now came the value of the blower door test. It pulled a negative on the entire house, and you could feel with your hand where air was being sucked into the house from outside. We found tons of places to seal that would have gone unnoticed without a blower door test:
Giant Sucking Sound, Take 2 A week later, our Energy Inspectors engineer returned to do a retest. Our permanent fixes — caulking ceiling can lights and sealing door jamb openings — had reduced airflow to 1,250 cfm. But our target was 900 cfm to equal 3 ACH, so we still had work to do. We found a vent fan that had been missed in the caulking operation, and more leaks in the laundry closet. Temporarily taping those up helped a little more. But where we decided to focus was on the floor leakage. We applied tape around the baseboards room by room, and the air flow gradually came down to about 1,000 cfm or 3.3 ACH. We were reluctant to tear the house apart at this stage of the project, so we had limited options. We decided to apply a bead of caulk around the interior base of all walls in the house to stop the leakage to the crawl space underneath permanently. This should get us very close to our target air leakage of 3 air changes per hour. Why 3 ACH? Building science nerds read on. Others may want to stop here. The most widely used measure of airtightness in the U.S. is the number of air changes per hour at 50 mpa pressure. At 3 air changes per hour, for instance, the air inside the house is replaced every 20 minutes by outside air. This is an important measure for indoor air quality, to ensure that the occupants of the space have fresh air to breathe. But it is an imperfect measure for air leakage. Why?
Because we felt we were casting about in the dark on air leakage, we consulted our favorite building science bloggers at Energy Vanguard and Building Science Corporation. They suggested a second helpful metric, air leakage per square feet of the building envelope. They suggested a target of 25 cfm per 100 square feet of building envelope as roughly equivalent to the 3 ACH benchmark. With our U-shaped house and vaulted great room, we have a little more envelope than a box of the same volume would. We calculated our ceiling, floor, and wall surface area to be roughly 6,100 square feet of envelope, which suggests a target of 1,525 cfm air leakage. We met that target after the first set of improvements. At 1,000 cfm, we were at about 16 on the envelope leakage measure, suggesting that our envelope was performing quite well. This gave us confidence to accept the air sealing after plugging the obvious holes and not reopen the envelope for further work. If we’d relied solely on the ACH figure, we might have been tempted to tear up the floors and start over. Note that we were unable to conduct a blower door test on the house prior to the remodel project, due to the presence of some asbestos in the attic that might have posed a hazard, and was promptly removed by the experts at ECG. We cannot compare our house to its old self, but typical houses often test at around 8 ACH or higher, so we have significantly improved our heating and cooling load and indoor air quality. Why indoor air quality? Because each air leak is a path for uncontrolled air to enter the house, from the crawlspace under the house, the attic, the garage, or the wall cavities. We believe it’s smart to close up as many of these pathways for uncontrolled air as possible and instead bring in fresh air from known locations with our supply vent fans and the windows. This way, we can ensure a healthy house and reduce space conditioning energy use. And maybe we can breathe easier when the Santa Ana winds blow and trigger our allergies every year, knowing that our house is controlling outside air infiltration. As for the question of how much air infiltration is just right… that’s up to you. New homes in our area are typically testing at around 3 ACH, and green builders can achieve 2.5 ACH. Each owner will have to weigh the cost of air sealing against the benefits – indoor air quality and reduced heating and cooling costs. We decided against spray foam insulation, for instance, which would have improved our air sealing but was expensive. Like many things about green building, air-tightness is a personal preference, so it’s up to you. 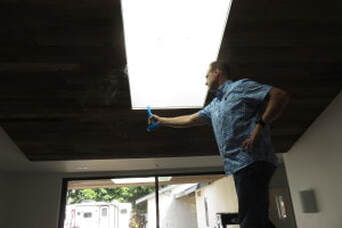 Dan sends smoke up the skylight well to check for leaks
3 Comments
|
Author Nick Brown, CEA Archives
May 2017
Categories |
|
|
Net Zero Blog |
 RSS Feed